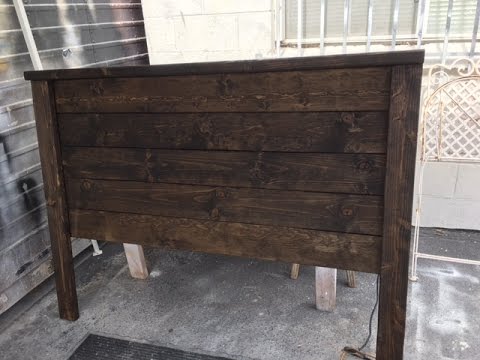
Build Your Own Headboard
Build Your Own Headboard. You can create your own one of a kind headboard whether you have carpentry skills or just like to dabble in simple craft projects. You will need to choose your shape first and then make sure that you have fabric and some foam on hand to create the headboard.
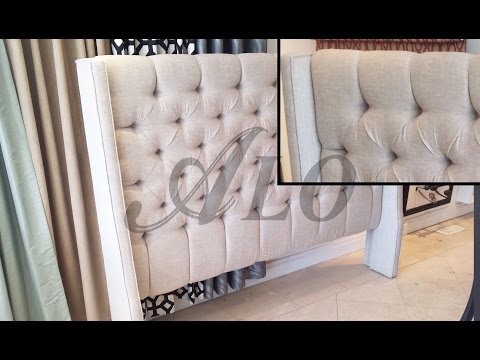
Hi guys so this video will be a tutorial. On how I was able
to make this headboard. That's behind me right now I love the. Way a headboard
pulls a room together. And kind of makes it look complete so I. Had been on the
market for one and I was. Looking for one I wanted it to be. Perfect and I also
wanted it to be. Affordable so I eventually decided to. Make my own headboard
because that was. Just a better option and so this video. Will show you exactly
how I was able to. Do that step by step I hope this video. Inspires you and if
you do end up making. Your own head work please be sure to. Share it with me
and yeah enjoy the. Video thank you you will need 320 inch. By 48 inch canvases
one pack of quilt. Batting for rolls optioning foam a heavy. Duty staple gun
spray adhesive nail trim. And scissors so the first thing you're. Going to do
is match the foam to the. Edge of the canvas this will show you. Exactly how
much of the film you'll need. To cut off once you figure that out draw.
A straight line to give yourself a. Cutting guide and after
doing that you. Can go ahead and cut off the extra now. That you have a piece
of foam and a. Canvas that are matching in size match. Them up on one side in
order to gauge. How big of a piece of foam you'll need. To cover the gap and
since all three. Panels are the same size. You only need to do this one you
can. Then draw lines on your fourth piece of. Cushion based on the measurements
you. Took. It should look something like this so. The next thing you want to do
to the. Next thing you want to cut the bagging. Take a little bit of that. So
the next step now is to staple the. Batting down to panel you want to make.
Sure it's nice and taut so I know. There's a small problem when I was. Making
the first panel the blue from the. Phone could be seen through the fabric. And
that changed the look of the fabric. Images didn't look very good so what I'm.
Doing to fix that is that our mini. Putting this drop cloth I got from Home.
Depot on top of it and this is going to. Be from that blue being seen through
the. Fabric and this is something that mostly. Applies things that are going to
be. Using white for their headboard if. You're using blue or something like
that. It's not really going to matter but.
Especially because I wanted that white. Look it didn't work
so if you're going. To be using I'm going to be using white. This gives
something that you could do. To prevent from that movie scenes. Remember so
here's what the panel looks. Like after the drop cloth has been. Stapled on to
it I just have to staple. Mine on a shiny side out and basically. Staple it on
the exact same way I had. Done with the job clock. Once you've done this step
you're now. Ready for the fabric so I've already. Done that side over there and
I learned. In doing this that to get it as tight as. Possible it's like a
parallel size so. Because they did that side I'm not going. To do this side and
then I'll move on to. The handy cyclist. So now for the nail head trim I've.
Already marked on here where I want each. Of the nails to go the nails are
going. One inch in from the side three-quarters. Of an inch in from the top and
there's. Two inches apart that's how I've decided. To do them so we've been
done already. Mark so I'm just going to go through and. Paste them run where I
want them to be. Doing this gives me a preview of where. Everything should sit
before I actually. Start hammering now for the hammer. Because we're doing
three separate. Panels you want to make sure number one. That you figure out
what your. Measurements are going to be any stick. To them for every one of
your panels so. What a replacement you decide for the. Individual nails you
have to stick to it. And be consistent and for me because I. Use paint
canvasses I had to be extra. Careful to ensure that I was getting the. Nails
inside of the wood properly. Because the wooden trim is spin and only. Runs
along the outside so when you're. Hovering them down you want to get rid. Of
some of the slack like hood so that. You're kind of hitting it at the right.
Spot and for your first hit you want to. Hit it too hard in piece you have to
go. Back and adjust. Finish hammering in all your nails and. Just like that
you've got yourself two. Completed headboard thank you so so much. For watching
and I really hope that this. Video brought you value and inspiration. Until
next.

Style by emily henderson. The most thrilling part of building a headboard from scratch is customizing the shape and size to suit your aesthetic and space. You will need to choose your shape first and then make sure that you have fabric and some foam on hand to create the headboard.
You ll cut the shape out of plywood and then cover that with foam like from an eggshell mattress cover and then cover again with fabric.
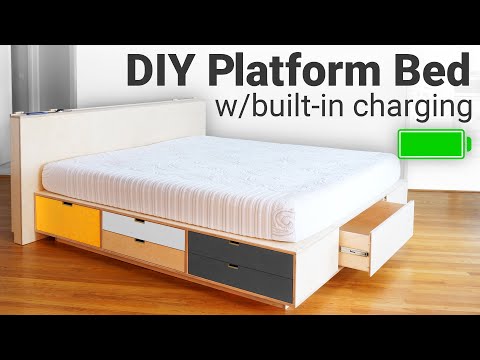
14 easy ways to make your own headboard headboards can make a strong statement in a bedroom adding color pattern and texture to the space above your pillows. Style by emily henderson. Even the noncrafty might consider a diy headboard for the simple fact that it will be more cost effective than buying one new but then there is the question of how to build a headboard. You can create your own one of a kind headboard whether you have carpentry skills or just like to dabble in simple craft projects.
This page contains many info about build your own headboard.
Videos of build your own headboard:


Duration: 02:10. Views: 672000+
Duration: 16:32. Views: 387000+
Duration: 17:35. Views: 746000+
Duration: 04:41. Views: 256000+


Good info about build own headboard.
ReplyDeleteSanjivani
Ayurvedashram